Re-fitting newer “Rubber Bumper” Midgets with old-style chrome bumpers.
The process of converting a Rubber Bumper Midget to older style chrome bumpers is a fairly simple one and could be accomplished in a weekend by a person with moderate mechanical skills. The change in appearance is quite dramatic (and positive in my opinion). No major structural changes are needed, so the rubber bumpers can always be re-fitted back if that is desired.
Before beginning this conversion, the owner needs to keep a few things in mind.
1. The rubber bumpers are excellent at protecting your car from minor bumps. The chrome bumpers are almost useless. If you live in an urban area and/or do a lot of parallel parking, you might want to leave the car as-is.
2. Some states utilize a motor vehicle inspection process that involves compliance with various federal regulations (primarily exhaust emissions). Depending on how rules are interpreted, the car might fail state inspection for lack of compliance to the 5 MPH federal standard (to be honest, this is the case in NJ, where I live…….however, my car has sailed through inspection four times, with no comments on the bumpers).
3. If the car is involved in an accident, an insurance adjuster might reduce any repair money you are due because of the non standard bumpers.
As a personal opinion, I am very glad that MG fitted the rubber bumpers to the Midgets and MGBs. This allowed them to continue exporting these cars to the U.S. for another few years. As regarding the bumpers themselves, I must say I think they look dreadful. I couldn’t wait to get mine off.
My conversion involves a ’78 Midget. I have read in various British enthusiast magazines that converting a Rubber Bumper MGB to chrome bumpers is also fairly easy. This is probably true, but I have no specific information about this.
You’ll need:
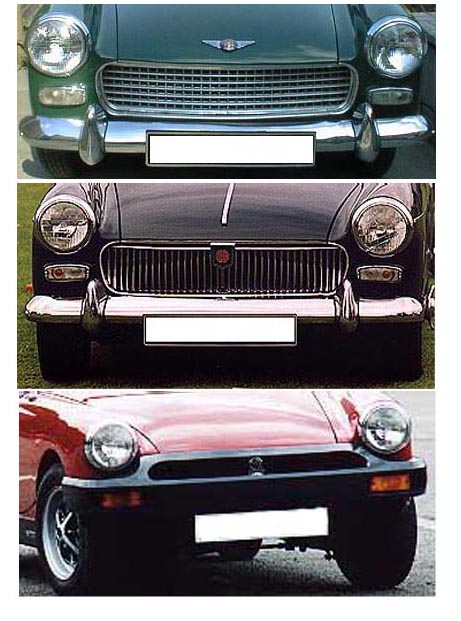
The pictures below show the two different styles of grills that will work (with the Rubber Bumper car at the bottom). I prefer the Sprite grill.

With the bumper removed the change in appearance is remarkable. You’ll notice that the lower part of the front fenders is painted black (to blend with the black bumpers). This black painted area might look odd with the chrome bumpers so I’d recommend painting it to match the body color. This is not a highly visible area (it's hidden by the bumper) and you may be able to find a brand of spray can enamel that close enough. Note that the area under the grill opening (called the valence) looks a bit different on newer Spridgets. Older cars simply have two holes for the bumpers supports to extend through. Newer cars have two larger slotted openings to provide added cooling (and the fabricated bumper supports will extend out through these openings).

Upon
removal of the front rubber bumper, you'll notice two "battering ram"

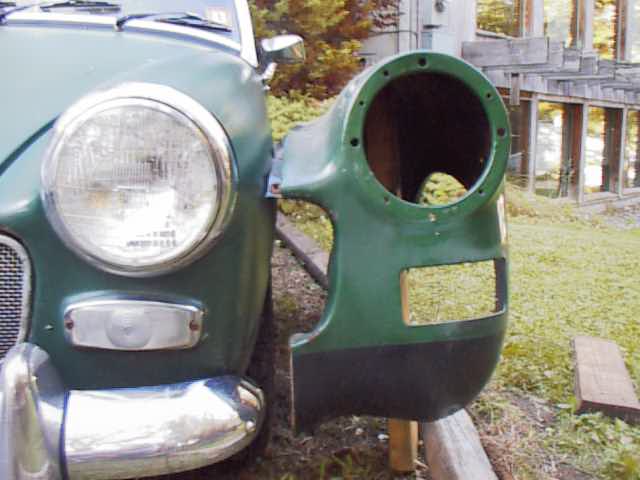
The fenders of newer (rubber bumper) cars are interchangeable with those of older cars, but the parking light cutout is shaped quite differently. The difference is obvious in the picture below.
As luck would have it, I was able to get two older fenders for my car (one of the original '78 fenders was in bad shape anyway). As a result, I simply installed the older fenders and used old style rectangular parking lights (I eliminated the side marker lights also....older fenders are not drilled for these). I expect most folks will modify their newer fenders to accept fender mounted parking lights. This would involve making a filler plate from sheet steel and welding or brazing it in place (I suppose a plate could also be neatly pop-riveted in place or the hole could be covered in fiberglass). Selection of parking lights would probably be based on what's available. If the original Sprite parking lights were available (got mine at a Flea Market for $5), this would be a good choice. Auto parts stores, trailer supply companies (and of course, junk yards) could be possible sources of acceptable rectangular shaped lights. Sources could include www.utilitytrailerparts.com or www.nationaltrailerparts.com . I'm sure there are many other companies that sell suitable lights. One point I would make here: since your working on the fenders anyway, take them off. Removing them will give you a chance to inspect and repair any rust damage at the front of the rocker panel (this is a notoriously rust-prone area in Spridgets).
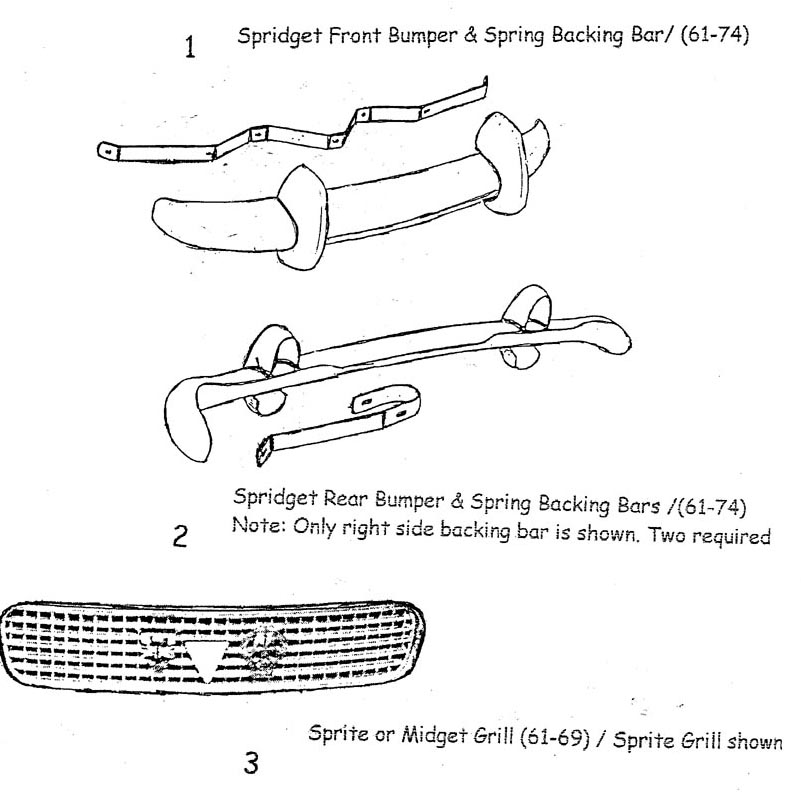
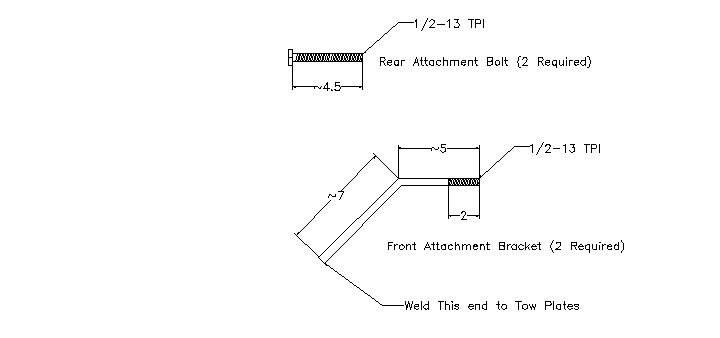
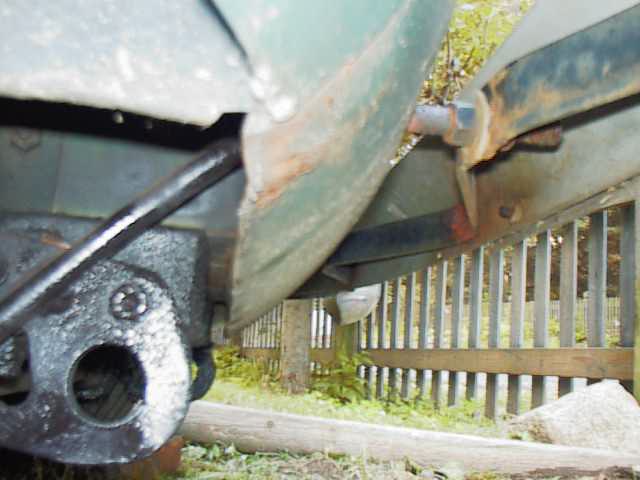
When I purchased my bumpers (at a British car show and flea market) I noticed that bumpers were pretty easy to find, but the mounts were not. In any event the mounts are not difficult to fabricate. Rear mounts (2 required) are simply a 4" long 1/2" diameter steel bolt that is fully threaded. The front mounts (also 2 required) consist of a 12" long piece of 1/2" diameter steel rod that is threaded at one end and bent near the middle at about a 45 degree angle. You may be able to use 12" long steel bolts (available at a building supply company) that have the heads cut off. The sketch below gives a general idea of the size and appearance of these fabricated mounts.
Half
inch threaded
The picture below shows the rear bumper mounted in this fashion (the piece of "slip over" foam has not been installed yet, so the naked threads are visible).
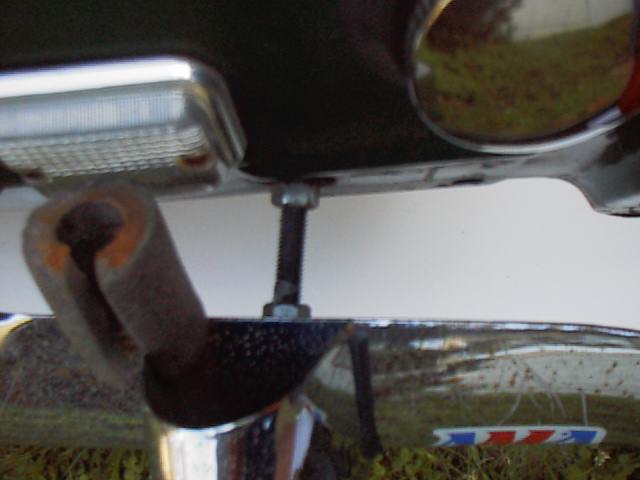
I
found that the easiest way to attach the fabricated front bumper mounts to the
car
If
the bumper looks straight after
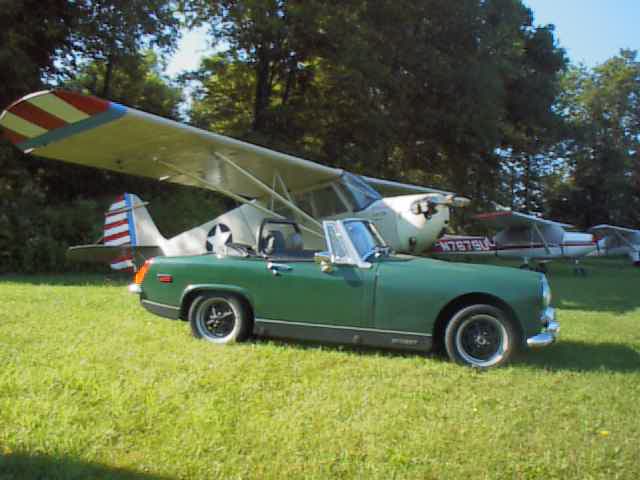
Here's a photo of my "de-rubberized" Spridget (with my Aeronca in the back round).
At this point, you've competed the conversion. From time to time, it's a good idea to check the tightness on the attachment bolts. Enjoy!