e-Zee mini-vise
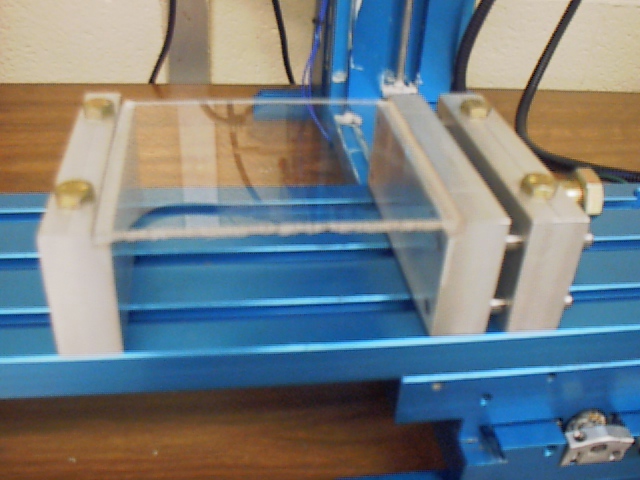
Here's a quick and easy way to put together a mini-vise suitable for a small milling machine. The vise was designed and built by Joe Younkers (or Lab Coordinator) and Paul Gonzalez (one of our student lab assistants). Our vise was built to suit our MAXCNC tabletop CNC mill, but the idea could be adapted for use in similar CNC or manual equipment.
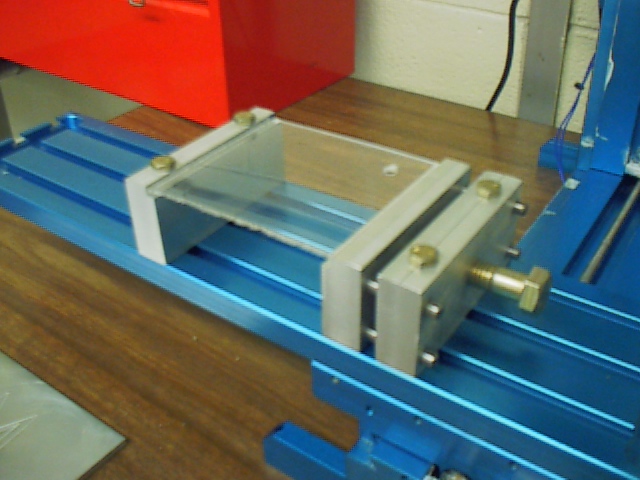
The vise is constructed in two parts. The "left fixed" jaw (as seen in the view above) has two 1/4" holes drilled vertically through (to tighten into T-slot nuts). A step is milled at the inner top side, to act as a parallel surface. This jaw can be located in any convenient position, to suit the length of the work piece. The right side of the vise has a "floating" jaw and a "threaded/fixed" part. The "floating" jaw has a step milled in the inner top side (similar to the "left fixed" jaw) and has 4 suitable dowel pins pressed into it (we used 3/16 diameter). The "threaded/fixed" side has a threaded hole located mid-face (1/2"-13 in our case) and four .193" diameter clearance/guide holes (for the dowel pins to slide in). It also has 1/4" holes drilled vertically through (again, to tighten into T-slot nuts). An ordinary 1/2"-13 bolt (3" long in our case), gives enough motion to tighten the "floating" jaw against the work piece.
Obviously, one could also place standard parallels between the jaws (and the step could be eliminated, if need be). Also, we purposely cut down a wrench to a length of about 4". This "short wrench", used on the 1/2"-13 bolt, prevents over-tightening (which might "spring" the table on some of these lightweight mills).