
McPopper Mystery Motor-
(you can read text while pictures load at bottom of page)
The sad story here is that I only built one of these........it ran perfectly the first time.....started very easy....idled nice and low......I ran it for about an hour with no problems. Then I decided to disassemble it (for pictures). When I put it back together, it wouldn't run! Spent the next two days fiddling with it to no avail. Finally gave up and converted it into another design. Still can't figure out what happened. My "build diary" is below...if you have any ideas on what went wrong, let me know....I'm still scratching my head over this one.
______________________________________________________________________________
Named due to the neat popping sound it makes (and the mysterious fact that we couldn't get it to run after disassembling it) , this one is really simple to build (and will run either direction). Very high torque engine.....difficult to stall. Main bearing is single block of 1" by 1" square aluminum, 1.5" tall. Block is 1.5" by 1" aluminum, 3" long. Block and bearing have tapped 1/4-20 threaded holes to attach to 3" by 6" base. Piston is long (at ~3") and is made up from 3/8" brass hex stock that is tuned to ~.375" (3/8" aluminum rod would work just as well). Con rod and crank are bent from 1/8" copper coated steel welding rod (but you could probably use .093 coat hanger wire). "Flywheel" is two 5" steel plates (1/8" by 1/2" or something similar) with the crank sandwiched between them (try to achieve decent balance with this). Block is bored 3/8" to just over 2.5 " deep. At top of cylinder (where spark plug would be on gas engine), a 5/16"-24 threaded intake hole is tapped. Two exhaust holes (1/16") are drilled just above bottom dead center on left and right side of block (so that they'll be uncovered by the piston...like a two stroke gas engine). At this point, I usually pour plenty of oil on the exposed parts and spin the engine over with a cordless drill chucked to the end of the crank.....do this for several minutes......breaks it in nicely.
The heart of this engine is a heavily modified tubeless tire valve, purchased in an auto parts store for about $1.50. All the rubber is stripped away from the valve (not an easy job) to reveal the brass body. With the valve core removed, about 1/8" is cut off the threaded end of the brass body...this allows the valve core "tip" to stick out when it's reinstalled. Using a 5/16-24 die, recut the thread to match the intake hole in the block (the original brass body has a fine pipe thread that is close to 5/16-24 so you can "get away" with this.... you may have to turn or file down any ridges on the body that stop the die from cutting). One more thing....while the valve core is out, you must "weaken" or remove the little spring in it. These engine don't generate enough power to overcome the valve core spring pressure (the spring isn't really that important in this application, since air pressure will hold the valve closed anyway).
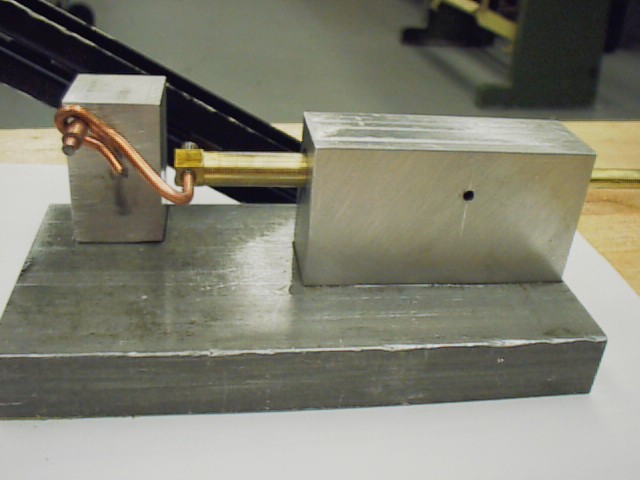
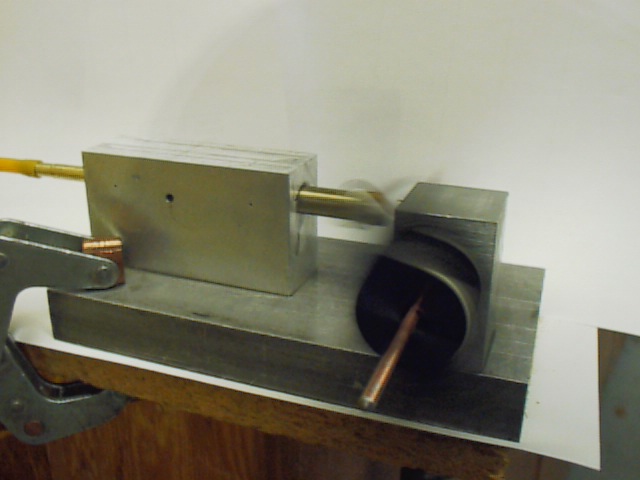
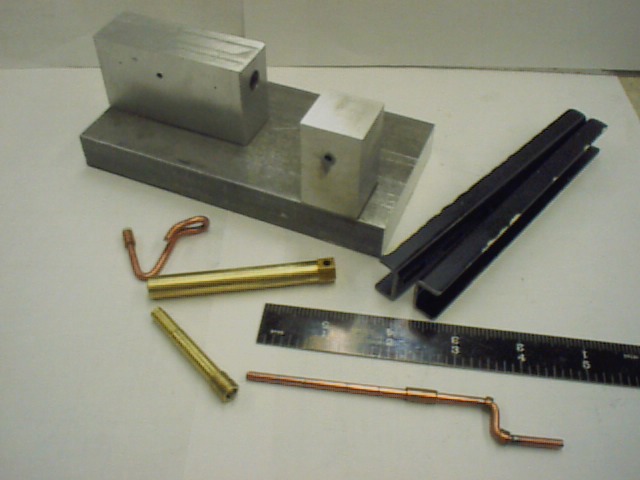
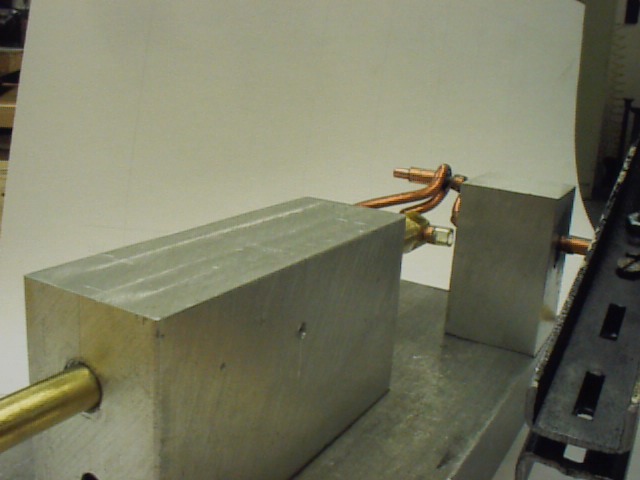
After reinstalling the valve core into the valve body, the body is screwed into the intake hole and the engine is turned over until the piston "just" hits the valve core tip. Connect air hose (such as surgical tubing) with 20-30 psi. and flip the engine either way. You can "tune" the engine by screwing the valve in and out while the engine is running. Once it's been set, I'd silicon seal it in place. This engines was a bit fussy regarding air pressure...wouldn't run on less than ~20 psi and won't run on more than ~35 psi, so you'll need a regulator (25 psi seems best). My father suggested the idea for this engine many years ago (I have no idea where he got it), but I didn't build the first one until 1999. A student pointed out that this engine works on the same principle as the "Air Hog" model air plane engine that is a popular Xmas gift this year....I looked at one and he's right! ( I wonder if this is how Whittle felt when he saw the early German jet engines?) Pictures: Top left is side view (plastic tubing slipped over crank and con rod acts as retainer/thrust washer) . Top right is flywheel side view running at about 400 RPM. Bottom left view is individual parts. Bottom right shows valve body screwed into block (hole in block below valve is a mistake!).


